The instructions in this section are only meant for those upgrading a standard kit to a pro kit using the seperate pro upgrade kit. If you have a pro Captain Cogbrow kit with the pro parts all in the box, and you are building for the first time, use the software on this website instead to use the new interactive assembly steps and build your Captain Cogbrow.
Disassemble Standard Parts
Starting out, we’re going to remove the few standard parts we won’t be using, to make room for the new pro parts.
We’re going to re-use a few bolts / pieces of hardware, so don’t throw anything away! These instructions will let you know which parts you’ll re-use.
Parts Needed:
- None (just removing parts this step)
Unplug The Circuit Board
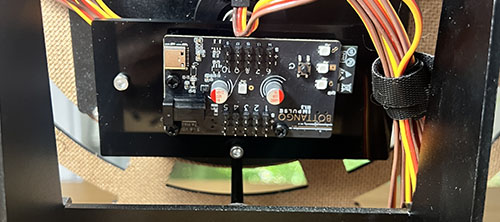
Unplug everything from the standard edition circuit board (power, usb, and all 7 servos). You can leave Captain Cogbrow on the stand for now, just take care not to knock the animatronic over, or to unplug any servo extension from it’s servo cable.
You should have the “Bottango Impulse” board mounted on the black plastic holder with nothing plugged into it.
Setup Working Area
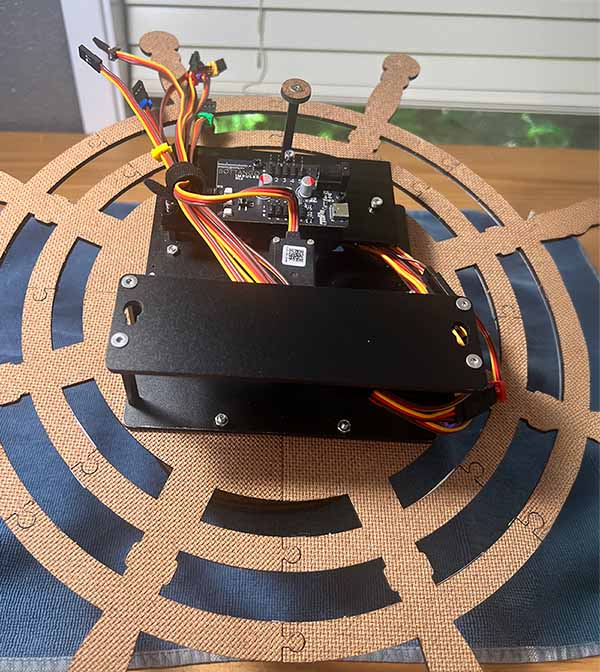
While we’re working on the animatronic, we’ll need to put it “face down.” Prepare an area with a small clean dish towel, etc, then remove Captain Cogbrow from the stand and place it face down, with the top of the head facing you.
Be careful! Try not to put pressure on the kit in this position, or to slide it around as that might damage the stickers on the front of the face.
Remove The Circuit Board And Holder
Remove the three metal m3 bolts that hold the plastic circuit board holder onto the animatronic, and place it to the side.
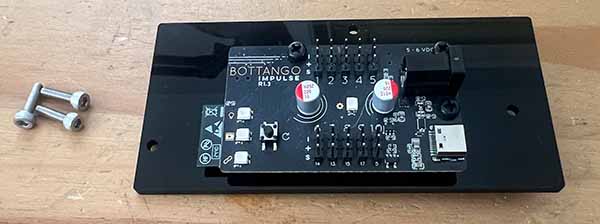
What you’ve taken off so far (plastic plate with Impulse and 3 metal mounting bolts) is not used in the Pro Kit.
Fun Fact! The Bottango Nova circuit board that came in your pro upgrade kit has the same mounting holes and pattern as Bottango Impulse. If you wanted to mount Bottango Nova somewhere, you could re-use the plastic plate you just removed for that purpose instead of keeping it with Nova.
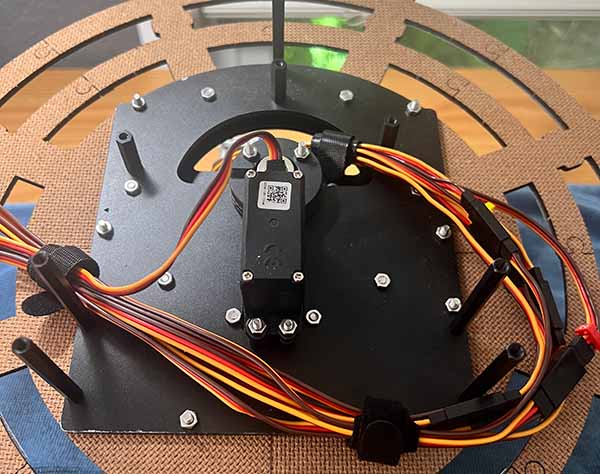
Remove the Standard Back Brace
Unscrew the 4 flat head metal bolts that attach the mounting brace. There will be 4 washers on the underside of the mounting brace.
Keep the 4 flat head bolts and washers, we’ll re-use those later.
The standard mounting brace isn’t needed in the pro kit.

Next Up
Next section, we’ll start adding new parts - the speakers and the new pro back brace.