Export Audio Files
Adding Audio and Video Files to Bottango
Section titled “Adding Audio and Video Files to Bottango”In order to play music on the Bottango Solar control board, you’ll need to import audio/video files into your Bottango project. If you haven’t already done so, be sure to check out the chapter on adding audio and video to your project.
Audio/Video Track in Animations
Section titled “Audio/Video Track in Animations”Importing the audio/video file into the Bottango project is a start, but you’ll also need to add it to the animations where you want it to play. Audio will play in the Bottango application and on your hardware only when audio keyframes in animations tell it to.
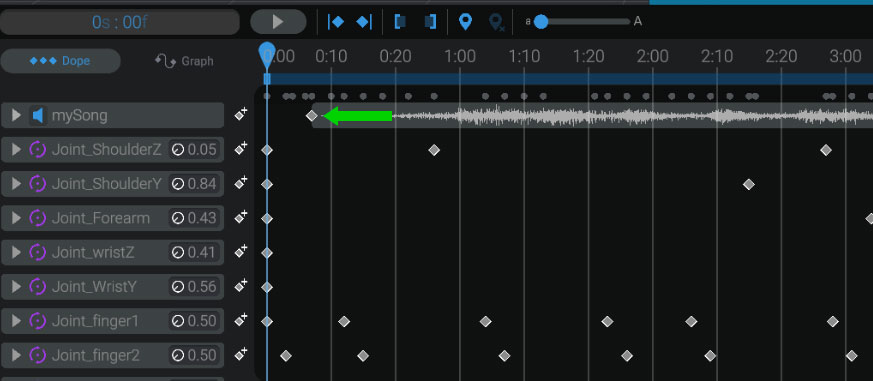
In this example, you can see that the audio file “mySong” has a keyframe for the imported audio clip near the beginning of the animation.
Mount the Solar SD Card on Your Computer
Section titled “Mount the Solar SD Card on Your Computer”Mount your microSD card on your computer. You will need either a computer with a microSD card slot, or a USB microSD card reader.
Connect to Bottango Solar
Section titled “Connect to Bottango Solar”Make sure Bottango Solar is connected to Bottango and is up to date. Bottango Solar will report to the Bottango application that it has audio playing functionality, and the additional options discussed below will only be shown if you have connected to Bottango Solar.
Set Up “Play On Hardware”
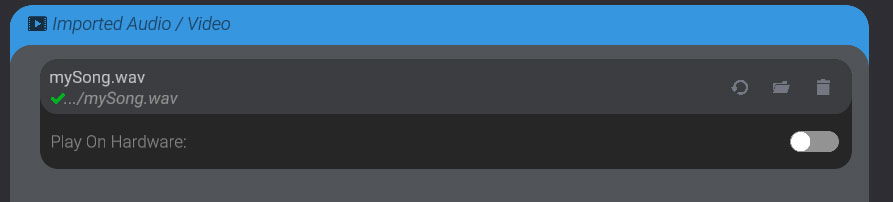
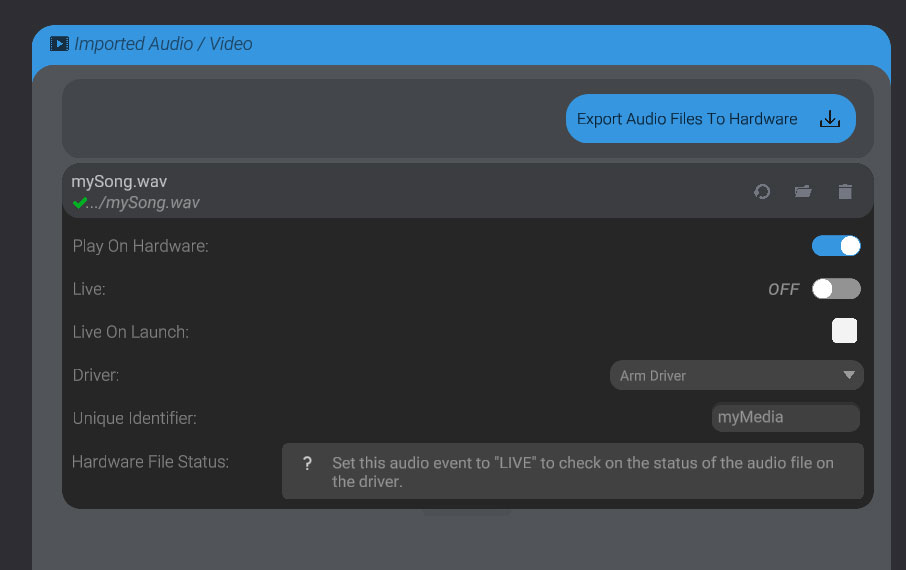
Section titled “Set Up “Play On Hardware””For any audio file you want to also play on your Bottango Solar board, you’ll need to enable the “Play On Hardware” option in the “Import” menu. When you do that, additional options will show up (be sure you’re connected to Bottango Solar).
Configure Options
Section titled “Configure Options”There are a few options you’ll need to be aware of:
-
Live: Just like setting a servo live / not live, audio on hardware needs to be toggled live or not live. For any audio file you want to play on hardware, after you export the audio files, be sure to toggle it live or else it won’t play.
-
Driver: This selects which board the audio will play on.
-
Unique Identifier: Each audio file you want to play on hardware needs a small unique name. The name can be 8 characters or less. You just need to pick something unique per audio file.
Associating an Audio File with a Video Track for Export
Section titled “Associating an Audio File with a Video Track for Export”At this time, the Bottango application cannot extract only the audio from a video file. You’ll need to provide a separate audio file in .WAV or .OGG format to generate the data Bottango Solar needs. There are many online converters that can generate audio files from video files. Once you have an audio file, set its location in the “Audio File For Export” section that shows up in video files. You can use the “folder” button in that section to select a file on your computer.
Export Audio Files
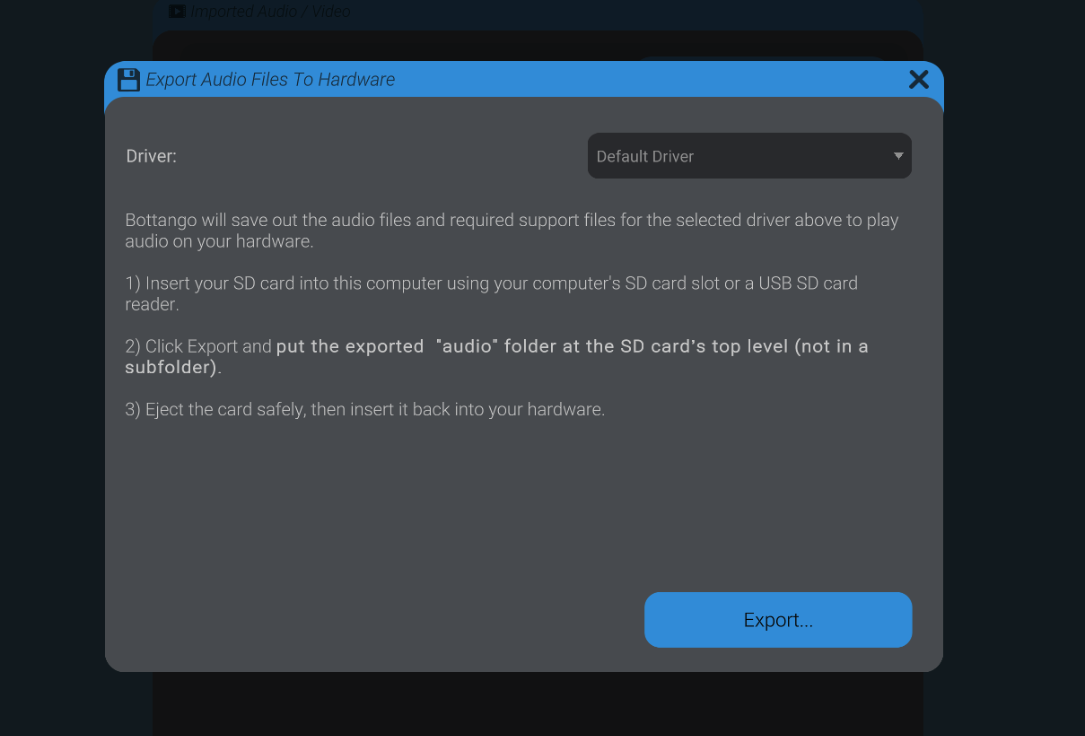
Section titled “Export Audio Files”Click the “Export Audio Files” button at the top of the menu, and follow the steps. Make sure “Default Driver” is selected, and place the exported “audio” folder at the root of your SD card.
Eject the SD card and put it back in Bottango Solar.
Set the Audio File Live in Bottango
Section titled “Set the Audio File Live in Bottango”With the audio files exported onto the SD card and placed back in Bottango Solar, turn the audio files you want to play on the hardware “Live.”
Bottango will check whether the SD card can be found, whether the audio file can be found on the SD card, and whether the audio data on the SD card matches what’s on your computer. If the audio file on the SD card doesn’t match the version on your computer, you’ll be given a warning that audio is out of date so you can update it, but you’ll still be able to play the audio.

If everything went to plan, you’ll see the audio file live in Bottango, and the SD card status as expected.