Standalone Show Controller Overview
Show controller functionality isn’t an entirely unique set of features. Instead, it’s the result of combining exporting animations and multi-board projects and wireless to create a show controller and network of interconnected Bottango control boards. If you haven’t read and understood these features, start there, then come back.
To create a show controller setup, choose one board to act as the show controller and as the bridge in your network of interconnected Bottango control boards. Bottango Nova is the board designed to best fill that role. Then you will set up the other control boards as peers that connect to the bridge.
When you export animations, you’ll export the animation data for all boards to one target, the bridge/show controller, and then set it to play exported animations. When the bridge/show controller plays an animation, it will serve out the animation data to all connected peer Bottango control boards.
Example Layout
Section titled “Example Layout”If you had the following:
- 1x Bottango Nova- 1x Bottango Solar- 1x Bottango Impulseyou would likely choose to have the Bottango Nova be the bridge / show controller. The Bottango Impulse and Solar control boards would connect to the bridge as peers.
Bottango Nova would contain all exported animations on its SD card and serve them out to the connected peers based on your animation triggering conditions.
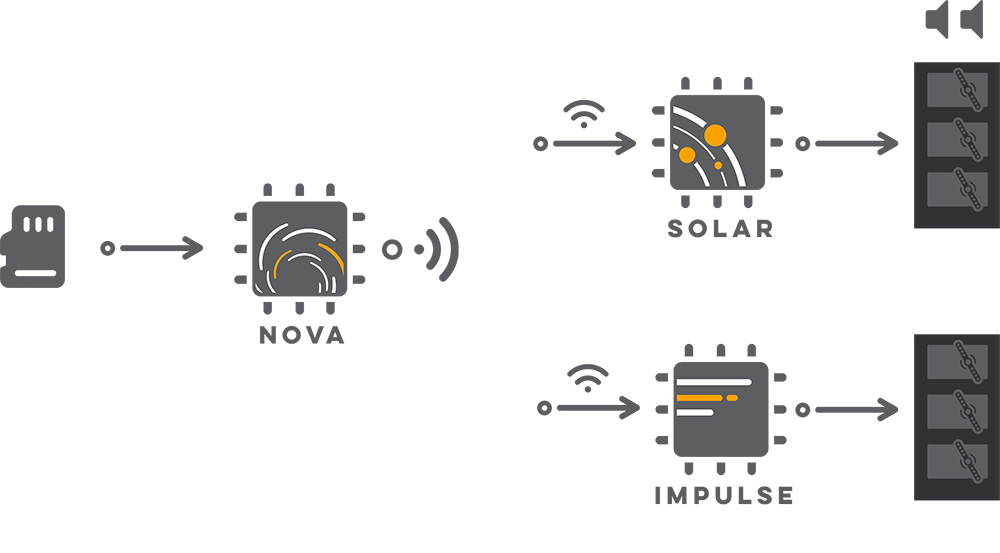
Though the above diagram shows a wireless connection, you can instead use wired RS485 for your show controller network if preferred.